
Mastering Resin Art: A Comprehensive Guide
Resin art has captured the imagination of artists and enthusiasts worldwide with its mesmerizing beauty and endless creative possibilities. From vibrant abstract paintings to intricate jewelry and functional decor, resin art offers a unique medium for self-expression. In this comprehensive guide, we’ll delve into the world of resin art, exploring its techniques, materials, safety precautions, and more. Whether you’re a seasoned artist or a curious beginner, this article will equip you with the knowledge and inspiration to master the art of resin.
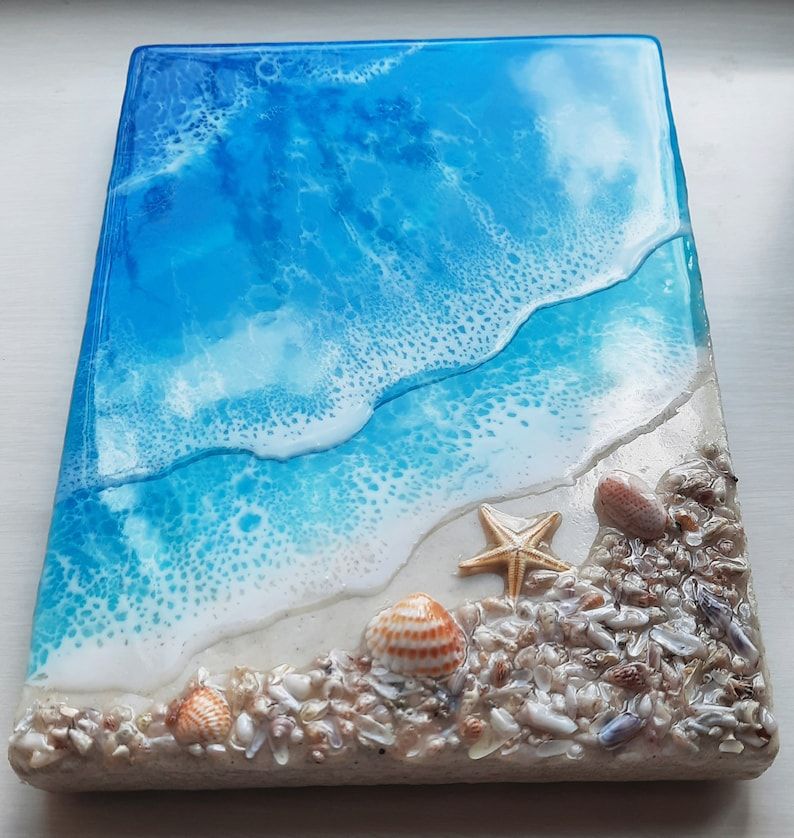
Resin art, also known as epoxy resin art, involves using epoxy resin—a durable, transparent polymer—as the primary medium for creating artwork. Artists mix resin with pigments, dyes, and other additives to achieve desired colors and effects before pouring the mixture onto a surface, such as a canvas, wood panel, or mold. As the resin cures, it transforms into a glossy, glass-like finish, preserving the colors and textures of the artwork.
The appeal of resin art lies in its versatility and aesthetic appeal. Unlike traditional painting mediums, resin allows artists to create multidimensional layers, vibrant colors, and captivating effects. Its durability and UV resistance make it suitable for both indoor and outdoor applications, ensuring that resin art pieces remain vibrant and long-lasting. Additionally, resin’s self-leveling properties result in smooth, flawless finishes, making it ideal for creating sleek, modern designs.
List of Best Resin Art Products to Buy in 2024:
- Table Koi Resin
- Peacock Blue Resin art
- Epoxy resin ocean lamp-Ocean
- Ocean Blue Wave Epoxy Round Table
- Guitar Table
- Framed Wall Art Crystal Treasure Tree
- Tropical Design Aquarium Epoxy Table
- Floating Nightstand with two drawers
- Anime box lamp
- Waterfall Blue River Epoxy Table
Table of Contents:
- Intro
- List of Best Resin Art Products to Buy in 2024
- What are the Resin Art techniques
- How to get started with Resin Art
- Safety precautions with Resin Art
- Tips and Tricks for Resin Art
- Maintenance and Care for Resin Art
- Conclusion
What are the Resin Art techniques
Resin art encompasses a wide range of techniques, each offering unique possibilities for artistic expression. Artists can experiment with techniques such as:
Layering: Building up multiple layers of resin to create depth and dimension.
This technique allows to experiment with transparency, color blending, and embedding objects to achieve unique and captivating effects. Here are more details about the layering technique in resin art:
- Preparation: Before starting the layering process, it’s essential to prepare your work surface and materials. Ensure that your surface is clean, level, and free from dust and debris. Gather your epoxy resin, pigments or dyes, mixing tools, molds or surfaces, and any additional embellishments or objects you plan to embed in the resin.
- Mixing Resin: Begin by mixing a small batch of epoxy resin according to the manufacturer’s instructions. Most epoxy resins consist of two components: resin and hardener. Measure the resin and hardener in the correct ratio and mix them thoroughly in a mixing cup. Use a stirring stick or paddle to ensure that the resin and hardener are fully combined, but avoid introducing air bubbles into the mixture.
- Pouring the Base Layer: Start by pouring a thin layer of resin onto your work surface as the base layer. Use a stirring stick or spreader to spread the resin evenly across the surface, ensuring complete coverage. You can tint the base layer with pigments or dyes to create a colored background or leave it transparent for a clear base.
- Curing: Allow the base layer to cure partially or completely according to the resin manufacturer’s instructions. This typically involves letting the resin sit for a specified amount of time to begin curing or placing it under a UV lamp or heat source to accelerate the curing process. Partially curing the base layer helps prevent bleeding or blending of subsequent layers.
- Adding Additional Layers: Once the base layer is partially cured, you can start adding additional layers of resin to create depth and dimension in your artwork. Mix another batch of resin and pour it over the cured base layer, taking care not to disturb the underlying surface. You can experiment with different colors, opacity levels, and effects in each layer, allowing them to blend or interact with each other for dynamic results.
- Finishing Touches: After adding all the desired layers and objects, allow the resin to cure completely according to the manufacturer’s instructions. Once cured, inspect the artwork for any imperfections or unevenness and sand the surface if necessary to achieve a smooth finish. You can also apply a final clear coat of resin to enhance the depth and shine of the layers and create a polished look.
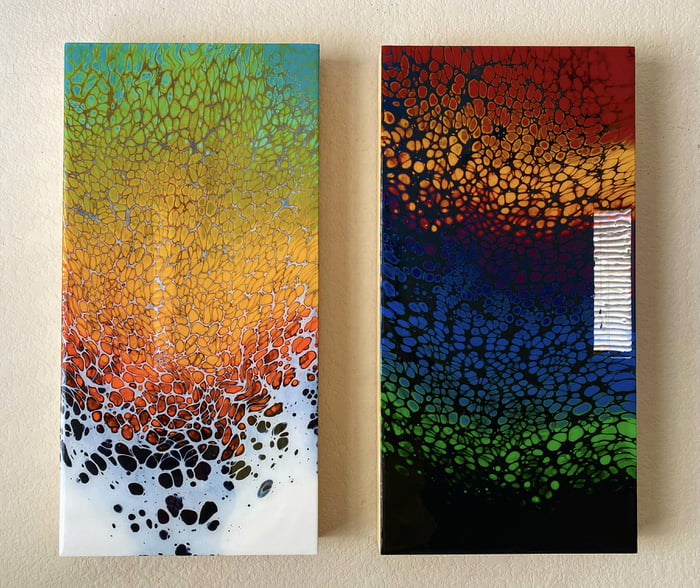
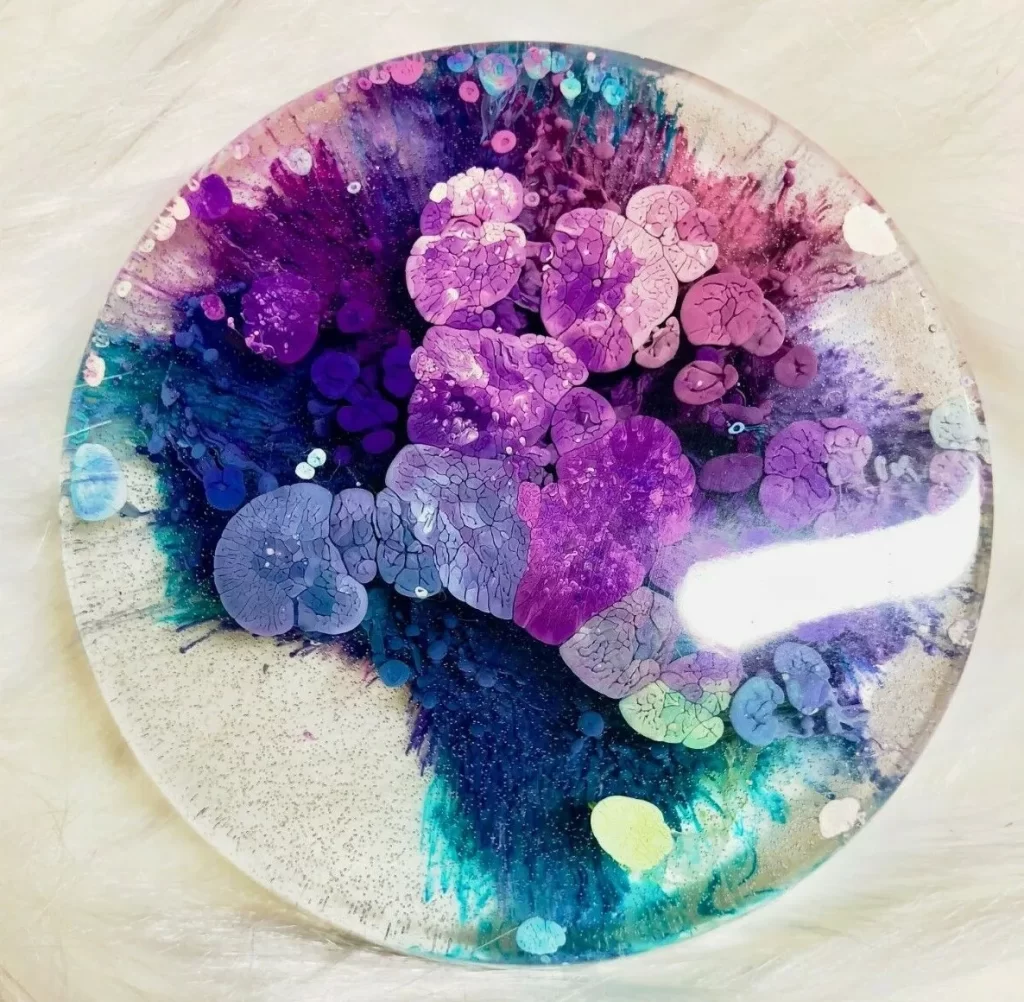
Swirling: Mixing different colors of resin to create dynamic swirls and patterns.
This technique allows to achieve mesmerizing visual compositions with fluid movement and organic shapes. Here are more details about the swirling technique in resin art:
- Color Selection: Start by selecting a palette of complementary or contrasting colors for your swirling design. You can use resin pigments, dyes, or alcohol inks to achieve vibrant hues and ensure good color contrast. Experiment with different color combinations to create the desired visual impact and mood in your artwork.
- Preparation: Before mixing your resin colors, it’s essential to prepare your work surface and materials. Ensure that your surface is clean, level, and free from dust and debris. Gather your epoxy resin, pigments or dyes, mixing tools, and containers for mixing and pouring.
- Mixing Resin: Mix separate batches of epoxy resin for each color you plan to use in your swirling design. Measure the resin and hardener components in the correct ratio and mix them thoroughly in separate mixing cups. Use stirring sticks or disposable pipettes to mix the resin and pigments evenly until you achieve the desired color intensity.
- Layering Colors: Once you’ve mixed your resin colors, pour them onto your work surface in a random or deliberate pattern, alternating between different colors to create layers. You can pour the resin in thin lines, puddles, or dots, depending on the effect you want to achieve. Experiment with different placement and distribution of colors to create unique swirling patterns.
- Swirling: Use a stirring stick, toothpick, or skewer to swirl and mix the colors together, creating dynamic patterns and movements within the resin. Drag the stirring tool through the resin in gentle, fluid motions, blending the colors while maintaining distinct swirls and lines. Avoid overmixing the colors to preserve the clarity and definition of the swirling patterns.
- Manipulation: As you swirl the colors together, you can manipulate the resin with tilting, rotating, or tilting the work surface to encourage the colors to flow and blend naturally. Experiment with different angles and movements to control the direction and intensity of the swirls, creating depth and dimension in your artwork.
- Curing: Allow the swirling resin to cure partially or completely according to the manufacturer’s instructions. This typically involves letting the resin sit for a specified amount of time to begin curing or placing it under a UV lamp or heat source to accelerate the curing process. Partially curing the resin helps maintain the integrity of the swirling patterns and prevents excessive blending or spreading of the colors.
- Finishing Touches: After the resin has cured completely, inspect the artwork for any imperfections or unevenness. Sand the surface lightly if necessary to achieve a smooth finish and remove any rough edges or drips. You can apply a clear coat of resin or a protective finish to enhance the depth and shine of the swirling patterns and preserve the artwork’s integrity.
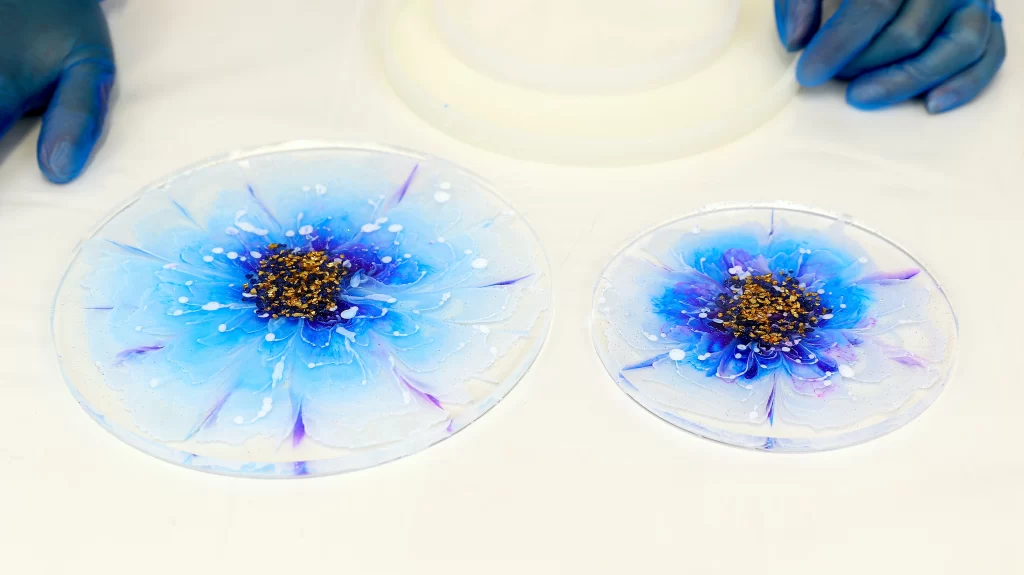
Embedding: Adding objects, such as flowers, leaves, or glitter, into the resin for added texture and visual interest
Here’s a detailed look at the process:
- Selection of Objects: Choose objects that complement your artistic vision and the theme of your resin piece. Natural materials like flowers, leaves, feathers, shells, or seeds can add an organic touch, while small charms, beads, sequins, or glitter can provide a decorative accent. Ensure that the objects are dry and free from moisture to prevent any unwanted reactions with the resin.
- Preparation of Objects: Prepare the selected objects by arranging them on a flat surface in the desired layout. Trim or adjust the size of the objects if necessary to fit the dimensions of your resin mold or surface. Consider experimenting with different arrangements and compositions to achieve the desired visual impact in your artwork.
- Resin Mixing: Mix a batch of epoxy resin according to the manufacturer’s instructions. Ensure that you measure the resin and hardener components accurately and mix them thoroughly to activate the curing process. It’s essential to work quickly but carefully to prevent the resin from curing before embedding the objects.
- Pouring the Base Layer: If your resin artwork requires multiple layers, start by pouring a thin base layer of clear resin into your mold or onto your work surface. This base layer serves as a foundation for embedding the objects and helps create depth and dimension in the artwork.
- Placing Objects: Once the base layer is poured and partially cured (if applicable), carefully place the prepared objects into the resin. Arrange the objects according to your desired composition, taking care not to disturb the resin too much to avoid creating air bubbles. Use tweezers or a toothpick to adjust the position of the objects as needed.
- Covering with Resin: After placing the objects, pour another layer of clear resin over them to encapsulate and secure them in place. Ensure that the resin completely covers the objects and fills any gaps or spaces around them. You may need to use a stirring stick or a toothpick to gently guide the resin around the objects and eliminate any trapped air bubbles.
- Curing Process: Allow the resin to cure completely according to the manufacturer’s instructions. This typically involves letting the resin sit undisturbed for a specified amount of time to allow it to harden and cure fully. Avoid moving or disturbing the artwork during the curing process to prevent any disruption to the embedded objects.
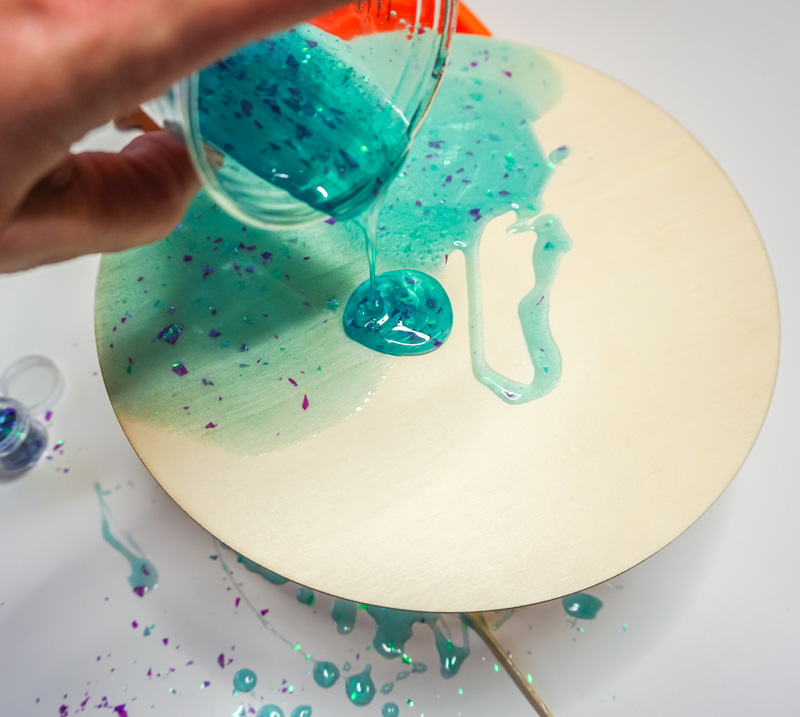
Resin pouring: Pouring resin onto a surface and manipulating it to create desired shapes and designs
This is a foundational technique in resin art that involves pouring epoxy resin onto a surface and manipulating it to create desired shapes, designs, and effects.
- Pouring Resin: Pour the mixed resin onto your prepared surface in a steady, controlled manner. Start by pouring a thin layer of resin to cover the entire surface evenly. Use a stirring stick or spreader to help distribute the resin and ensure complete coverage. Depending on your design, you can pour multiple layers of resin to build up depth and dimension in your artwork.
- Manipulating Resin: Once the resin is poured, you can manipulate it using various techniques to create your desired shapes and designs. Use tools such as stirring sticks, palette knives, spatulas, or heat guns to spread, swirl, or move the resin around the surface. Experiment with different movements and gestures to achieve different effects, such as blending colors, creating texture, or defining lines and shapes.
Alcohol ink: Using alcohol-based inks to create vibrant, fluid designs within the resin.
Alcohol ink is a highly pigmented, fast-drying medium that is compatible with epoxy resin, making it ideal for creating intricate patterns, abstract designs, and dynamic compositions. Here’s a detailed look at how to use alcohol ink in resin art:
- Selection of Alcohol Inks: Start by selecting alcohol inks in a variety of colors to suit your artistic vision and desired color palette. Alcohol inks come in liquid form and are available in a wide range of colors, including vibrant hues, metallics, and translucent shades. Choose alcohol inks specifically formulated for use with resin to ensure compatibility and optimal results.
- Preparation of Resin: Mix a batch of epoxy resin according to the manufacturer’s instructions. Measure the resin and hardener components accurately and mix them thoroughly in a mixing cup. Ensure that the resin is clear and free from bubbles before adding alcohol ink.
- Adding Alcohol Ink: Once the resin is mixed, add drops of alcohol ink directly into the resin mixture. Start with a small amount of ink and gradually add more to achieve the desired color intensity. You can use a single color or multiple colors to create layered or blended effects. Experiment with different color combinations and placement to create unique designs.
- Mixing and Blending: Use a stirring stick or stirring wand to gently mix the alcohol ink into the resin, ensuring that the colors are evenly distributed. Avoid overmixing the resin to prevent muddying the colors or creating unwanted air bubbles. You can also use a heat gun or torch to help disperse the ink and create interesting patterns and textures within the resin.
- Pouring and Manipulating: Once the alcohol ink is mixed into the resin, pour the mixture onto your prepared surface or into your chosen mold. Use a stirring stick or palette knife to spread the resin evenly across the surface, ensuring complete coverage. You can also tilt or rotate the surface to encourage the resin to flow and create dynamic patterns and designs.
- Adding Additional Layers: For more complex designs, you can pour multiple layers of resin infused with alcohol ink. Allow each layer to partially cure before adding the next layer to prevent bleeding or blending of colors. You can also use masking techniques or stencils to create defined shapes or boundaries within the resin.
How to get started with Resin Art
Research and Education:
- Start by researching resin art techniques, materials, and safety precautions. Look for online tutorials, articles, books, and videos that provide comprehensive information about resin art.
- Educate yourself about the different types of resin, such as epoxy resin and polyester resin, as well as their properties, curing times, and applications
Safety Precautions:
- Prioritize safety by familiarizing yourself with proper ventilation, personal protective equipment (PPE), and handling procedures for resin.
- Invest in essential safety gear, including gloves, goggles, and a respirator, to protect yourself from resin fumes and skin irritation.
Start with Small Projects:
- Begin your resin art journey by starting with small, simple projects to familiarize yourself with the materials and techniques.
- Consider starting with projects like coasters, jewelry, or small art pieces before tackling larger projects
Gather Essential Materials:
- Purchase essential materials for resin art, including epoxy resin, pigments or dyes, mixing tools, molds or surfaces, and safety equipment.
Where to Buy Essential Materials:
- Epoxy Resin: Look for epoxy resin kits or individual bottles from reputable brands like ArtResin, Pro Marine Supplies, and Crystal Clear Epoxy Resin. These brands offer high-quality resin suitable for art projects.
Our top brand is Let’s Resin There you can find epoxy resin, pigments, molds, or tools, each item is meticulously crafted to meet the highest standards of excellence. If you are about to start your resin art journey, purchase a starter kit
If you are already have skills in resin art, check out their best sellers here - Pigments and Dyes: Purchase resin pigments, alcohol inks, or liquid dyes specifically formulated for use with resin. Brands like Just Resin, Jacquard Pinata, and Ranger Ink offer a wide range of colors and effects.
- Mixing Tools: Invest in silicone mixing cups, stirring sticks, and disposable gloves for mixing and handling resin. You can find mixing tools in Let’s Resin online store.
- Molds and Surfaces: Choose silicone molds, canvas panels, wood boards, or trays for resin casting or pouring. Look for molds and surfaces in various shapes and sizes to suit your artistic preferences.
Experiment and Practice:
- Set up a well-ventilated workspace with a clean, level surface for working with resin.
- Experiment with different resin art techniques, such as pouring, layering, swirling, and embedding, to discover your artistic style.
- Practice mixing resin, adding colorants, and pouring resin onto different surfaces to gain confidence and proficiency in resin art.
Safety precautions with Resin Art
Work in a Well-Ventilated Area
Resin emits fumes during the mixing and curing process, which can be harmful if inhaled in high concentrations. To minimize the risk of respiratory irritation or health effects, it’s crucial to work in a well-ventilated area with good airflow.
Choose a workspace with windows or doors that can be opened to allow fresh air to circulate. Consider using fans or ventilation systems to help disperse fumes and maintain air quality.
Wear Appropriate Personal Protective Equipment (PPE)
Wear disposable gloves to prevent direct skin contact with uncured resin, which can cause skin irritation, allergic reactions, or dermatitis.
Wear safety goggles or protective eyewear to shield your eyes from splashes or spills of resin and to prevent eye irritation or injury.
Use a respirator with organic vapor cartridges to filter out harmful fumes and airborne particles generated during resin mixing and curing. Choose a respirator that provides adequate protection against resin vapors and fits snugly over your nose and mouth.
Avoid Direct Skin Contact with Uncured Resin
Uncured resin can cause skin irritation, allergic reactions, or dermatitis if it comes into direct contact with the skin. To minimize the risk of skin exposure, avoid touching resin with bare hands and wear disposable gloves when handling resin and resin-coated materials.
If resin comes into contact with your skin, immediately wash the affected area with soap and water to remove any resin residue. Avoid using solvents or harsh chemicals, as they can exacerbate skin irritation or allergic reactions.
Dispose of Resin Waste Properly
Avoid pouring resin waste down the sink or drain, as it can clog pipes and contaminate water sources. Instead, dispose of resin waste in designated hazardous waste containers or follow local recycling or disposal guidelines.
Use disposable mixing cups, stirring sticks, and other tools whenever possible to minimize waste and simplify cleanup. Clean reusable tools and equipment with isopropyl alcohol or resin cleaning solutions before reuse.
Tips and Tricks for Resin Art
Measure Resin and Hardener Accurately
Proper measurement of resin and hardener is crucial for achieving successful curing and optimal results in resin art. Use precise measuring tools, such as graduated mixing cups or digital scales, to measure the resin and hardener components in the correct ratio specified by the manufacturer.
Follow the manufacturer’s instructions closely to ensure the proper mixing ratio, as different brands of resin may have varying ratios. Avoid eyeballing or estimating the amounts, as inaccuracies can lead to incomplete curing or tacky, sticky resin.
Use a Torch or Heat Gun for Air Bubble Removal
Air bubbles can form in resin during the mixing and pouring process, detracting from the clarity and finish of your artwork. Use a torch or heat gun to gently pass over the surface of the resin to release trapped air bubbles and achieve a smooth, bubble-free finish.
Hold the torch or heat gun several inches above the resin surface and move it in a sweeping motion to evenly distribute heat and eliminate bubbles. Be cautious not to hold the flame too close to the resin or for too long to avoid scorching or overheating.
Experiment with Different Pigments, Additives, and Techniques
Resin art offers endless possibilities for experimentation and creativity. Explore a variety of pigments, dyes, mica powders, alcohol inks, and other additives to customize your color palette and achieve unique effects in your artwork.
Experiment with different techniques, such as layering, swirling, dripping, or embedding objects, to create depth, texture, and visual interest in your resin pieces. Don’t be afraid to mix and match techniques to discover your own signature style.
Practice Proper Surface Preparation:
Proper surface preparation is essential for ensuring good adhesion and durability of your resin artwork. Sand the surface of your substrate, such as wood, canvas, or paper, to create a rough texture that promotes adhesion.
Prime the surface with a suitable primer or sealant to create a barrier between the substrate and the resin, preventing absorption and ensuring even coverage. Allow the primer to dry completely before applying resin.
Maintenance and Care for Resin Art
To preserve the beauty and longevity of your resin art pieces, follow these maintenance and care tips:
Cleaning Resin Surfaces
Clean resin surfaces regularly to remove dust, fingerprints, and surface contaminants that can detract from the appearance of your artwork. Use a soft, lint-free cloth dampened with a mild soap and water solution to gently wipe the surface clean.
Avoid using harsh or abrasive cleaners, solvents, or chemicals on resin surfaces, as they can damage the finish and dull the shine. Opt for gentle cleaning products specifically formulated for use on resin or acrylic surfaces.
Avoiding Direct Sunlight
Resin art pieces are susceptible to damage from prolonged exposure to ultraviolet (UV) light, which can cause yellowing, discoloration, and fading over time. To preserve the vibrancy and clarity of your artwork, avoid placing resin pieces in direct sunlight or near sources of heat and UV radiation.
If displaying resin art pieces in a sunny room or near windows, consider using UV-blocking window film or protective coatings to reduce UV exposure and minimize the risk of damage.
Storing Resin Art Pieces
When not in use or on display, store resin art pieces in a cool, dry place away from direct sunlight, dust, and humidity. Choose a storage area with stable temperature and humidity levels to prevent warping, cracking, or other damage to the resin.
Use protective coverings or storage containers to shield resin pieces from dust, moisture, and physical impact during storage. Wrap delicate or fragile pieces in acid-free tissue paper or bubble wrap to provide additional protection.
Handle with Care
Handle resin art pieces with care to avoid scratches, chips, or cracks that can mar the surface and detract from the overall appearance of the artwork. When handling resin pieces, use both hands to support and lift them, especially larger or heavier pieces.
Avoid placing heavy or sharp objects on top of resin surfaces, as they can leave impressions or indentations in the resin. Use coasters, trivets, or protective pads to prevent scratches and damage to resin tabletops or countertops.
Conclusion
Resin art is more than just a creative outlet; it’s a journey of discovery and expression that allows artists to push the boundaries of their imagination. With its endless possibilities and versatility, resin art captivates both creators and viewers alike, offering a mesmerizing blend of colors, textures, and forms.
By honing your skills, experimenting with different techniques, and embracing new materials, you can unlock the full potential of resin art and create pieces that resonate with your unique vision and style. Whether you’re drawn to the fluidity of abstract paintings, the intricacy of jewelry design, or the functionality of resin decor, there’s a world of inspiration waiting to be explored.
As you embark on your resin art journey, remember to prioritize safety and care, both for yourself and your creations. By working in a well-ventilated space, using proper protective equipment, and maintaining your artwork with diligence, you can ensure that your pieces stand the test of time and continue to inspire admiration for years to come.
So, gather your materials, embrace the possibilities, and let your creativity flow. With resin art, the only limit is your imagination.